This page provides basic information about the core functions of the Digital Library of Medieval Manuscripts viewer and how to use it:
• Exploring the opening screen of the DLMM viewer, choosing collections, and using the browse and search functionalities
• Viewing, manipulating, and comparing images
• Viewing annotations
• Searching within manuscript metadata and annotations
This site and the viewer works in most common browsers including Chrome, Firefox, Internet Explorer and Safari. Older browser versions may show errors. For technical problems with using the site or the viewer contact us.
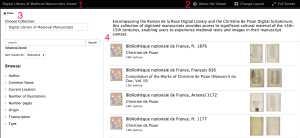
In Figure 1 you can see the opening screen of the DLMM viewer. This is a gallery consisting of all the books that are part of the DLMM corpus. The magenta numbers on this image indicate some important parts of the opening screen.
1. On the top left of the screen, you can click on the title line to access this WordPress site. While the viewer allows you to browse and search the manuscripts in the collection, this companion website contains information about the the DLMM projects, including, amongst other things, project histories, information about the works represented, and spreadsheets of extant manuscripts.
2. On the top right of the screen you can click on ‘About the Viewer’ to be brought to this page. There are also buttons for changing the layout and toggling to full screen. We will discuss layout change below.
3. In the left-hand pane you can choose a collection, as well as browse and search the collections.
4. On the right-hand side you can scroll through the manuscripts in the collection, each of which are identified by a shelf-mark, a short description of the contents, the century the manuscript was created, and a couple of thumbnail images from the start of the manuscript.
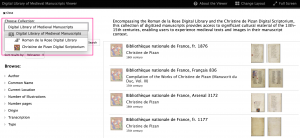
In Figure 2, the magenta box highlights where you can choose a collection. Currently, you can explore the entire DLMM, or just search and browse within the Roman de la Rose or Christine de Pizan collections.
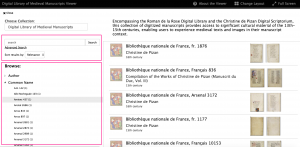
You can use the basic search box to search for terms within the manuscript metadata, annotations, and transcriptions (see the top magenta box in Figure 3). By clicking on the ‘Advanced Search’ link you can narrow your investigation to look for search terms within manuscript descriptions, titles, people (usually characters, but occasionally authors as mentioned within transcriptions, depicted in images, or), places (as they occur in metadata and transcriptions), repositories of manuscripts, and transcriptions.
The Browse function (the bottom magenta box in Figure 3) enables you to narrow the list of manuscripts displayed by common name of the manuscripts, current location, number of illustrations in each codex, number of pages, origin of each manuscript, whether or not they are transcribed, and the type of substrate (parchment or paper).
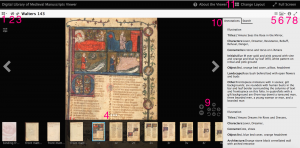
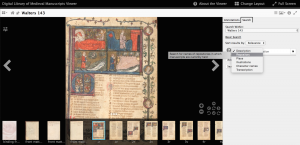
Figure 4 shows a “workspace,” a panel in the DLMM viewer consisting of the digital image and a transcription viewing and search panel as shown above. In the workspace, you can scroll through the images by clicking on the arrows at the left and right of the image.
The numbers in Figure 4 indicate the following:
(1) Add object: this allows you to add more viewing panes. A new pane is blank with a plus button that, when clicked on, will take you back to the manuscript gallery where you can choose an image to add to that pane. This function allows easy comparison of 2 or more manuscripts on your computer screen. The “Change Layout” feature in the ribbon along the top also allows you to control the number of images displayed.
(2) Home button (go back to book gallery).
(3) Pin window
(4) Enable/disable thumbnails: clicking on the three small squares at the bottom of the manuscript image will either show or hide the thumbnail gallery along the bottom of the screen. By clicking on one of the thumbnails, a particular book is opened in the workspace.
(5) Open/close annotation panel
(6) Open image viewing menu: this enables you to modify the way in which images are displayed (e.g., as thumbnails or openings of a book).
(7) Open object information/metadata panel
(8) Make workspace full screen.
(9) The control panel allows you to manipulate the size, position, and rotation of the image. The centre button allows you to restore the image to its original size and orientation and center it in the workspace.
(10) The annotations pane allows you view any transcriptions or image descriptions.
A separate tab within the annotations panel opens the search panel (see Figure 5). There are two ways to search the DLMM: a simple string-based search, which returns keywords, or an advanced search. The advanced search allows for searching within transcriptions, manuscript metadata, and image descriptions.
Sidebar